In this Spring Security tutorial, we will learn how to use Spring Security provided built-in Form-Based Authentication.
Spring Security provides support for username and password is provided through an HTML form.
Form-Based Authentication Overview
Form-based authentication uses standard HTML form (Login Form) fields to pass the username and password values to the server via a POST request.
In Form-based authentication, the server validates the credentials provided and creates a “session” tied to a unique token stored in a cookie and passed between the client and the server on each HTTP request. If the cookie is invalid or the user is logged out, the server then usually redirects to a login page.
Maven Dependencies
In order to implement Spring Security provided built-in Form-Based Authentication, we need to add below two Maven dependencies:
		<dependency>
			<groupId>org.springframework.boot</groupId>
			<artifactId>spring-boot-starter-security</artifactId>
		</dependency>

		<dependency>
			<groupId>org.springframework.boot</groupId>
			<artifactId>spring-boot-starter-thymeleaf</artifactId>
		</dependency>
Note that we are using Thymeleaf to create a simple template welcome.html that we return that template after login success.
Spring Security Configuration
By default, Spring Security form login is enabled. However, as soon as any servlet-based configuration is provided, form-based login must be explicitly provided.
The below configuration shows a minimal, explicit Java configuration:
    @Bean
    SecurityFilterChain securityFilterChain(HttpSecurity http) throws Exception {

        http.csrf().disable()
                .authorizeHttpRequests((authorize) -> {
                    authorize.anyRequest().authenticated();
                }).formLogin(Customizer.withDefaults());
        return http.build();
    }
In order to test the form-based authentication, let's create a couple of in-memory objects. In the below InMemoryUserDetailsManager Java Configuration, we have created two users and stored them in the InMemoryUserDetailsManager class object.
    @Bean
    public UserDetailsService userDetailsService(){

        UserDetails ramesh = User.builder()
                .username("ramesh")
                .password(passwordEncoder().encode("password"))
                .roles("USER")
                .build();

        UserDetails admin = User.builder()
                .username("admin")
                .password(passwordEncoder().encode("admin"))
                .roles("ADMIN")
                .build();

        return new InMemoryUserDetailsManager(ramesh, admin);
    }
We are using BCryptPasswordEncoder class which implements the PasswordEncoder interface. The BCryptPasswordEncoder class implementation uses the widely supported bcrypt algorithm to hash the passwords.
    @Bean
    public static PasswordEncoder passwordEncoder(){
        return new BCryptPasswordEncoder();
} .password(passwordEncoder().encode("password"))Here is the complete Spring Security configuration code:
import org.springframework.context.annotation.Bean;
import org.springframework.context.annotation.Configuration;
import org.springframework.security.config.Customizer;
import org.springframework.security.config.annotation.method.configuration.EnableMethodSecurity;
import org.springframework.security.config.annotation.web.builders.HttpSecurity;
import org.springframework.security.core.userdetails.User;
import org.springframework.security.core.userdetails.UserDetails;
import org.springframework.security.core.userdetails.UserDetailsService;
import org.springframework.security.crypto.bcrypt.BCryptPasswordEncoder;
import org.springframework.security.crypto.password.PasswordEncoder;
import org.springframework.security.provisioning.InMemoryUserDetailsManager;
import org.springframework.security.web.SecurityFilterChain;

@Configuration
public class SpringSecurityConfig {

    @Bean
    public static PasswordEncoder passwordEncoder(){
        return new BCryptPasswordEncoder();
    }

    @Bean
    SecurityFilterChain securityFilterChain(HttpSecurity http) throws Exception {

        http.csrf().disable()
                .authorizeHttpRequests((authorize) -> {
                    authorize.anyRequest().authenticated();
                }).formLogin(Customizer.withDefaults());
        return http.build();
    }

    @Bean
    public UserDetailsService userDetailsService(){

        UserDetails ramesh = User.builder()
                .username("ramesh")
                .password(passwordEncoder().encode("password"))
                .roles("USER")
                .build();

        UserDetails admin = User.builder()
                .username("admin")
                .password(passwordEncoder().encode("admin"))
                .roles("ADMIN")
                .build();

        return new InMemoryUserDetailsManager(ramesh, admin);
    }
}
Create WelcomeController and Thymeleaf Template
WelcomeController
import org.springframework.stereotype.Controller;
import org.springframework.web.bind.annotation.GetMapping;

@Controller
public class WelComeController {

    @GetMapping("/")
    public String greeting() {
        return "welcome";
    }
}
Thymeleaf Template - welcome.html
Under /resources/templates folder, create a welcome.html file and add the following content:
<html>
<body>
<h1> Welcome to Spring Security world!</h1>
</body>
</html>
Use Spring Security's Default Login Page
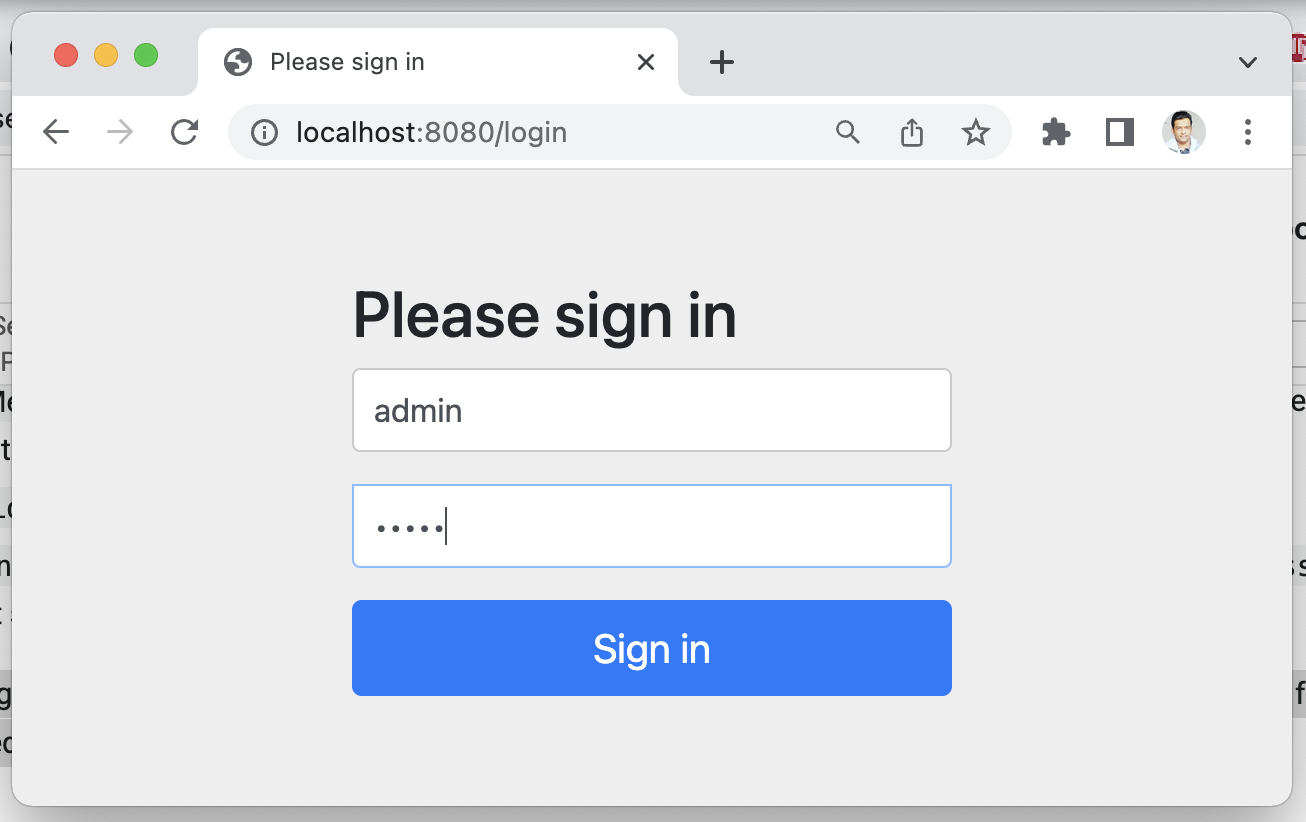
By default, Spring Security provides a built-in Login form to secure the web application:
Test using Browser
Enter http://localhost:8080 URL in the browser and it will navigate to the login page. Next, enter a username as admin, password as admin, and click on the Sign-in button:
Built-In Logout Feature
Spring Security provided a built-in logout feature as well. Just enter http://localhost:8080/logout URL in the browser to logout from the application:


Comments
Post a Comment
Leave Comment